
When I saw it, my initial thought was "I bet I could make that!" And, by golly, I could! (Not surprisingly, seeing as how they make these for folks to find their inspiration. It's how those craft stores grab ya!)
Supplies that I purchased for this project:
A wood frame that they sell at Craft Warehouse. You could probably find a frame of just about any kind and make this though.
Red Paint (which I actually already had at home)
Ribbon for the border
Some bling or ribbon or whatever your little heart desires for the inside
Vinyl for the words
Mod Podge to secure the ribbon
 |
| Here it is, a blank piece of wood just waiting to have something gorgeous applied to it |

Instead of blinging up the sides like the Craft Warehouse example, I used some cute snowflake ribbon that I found and just placed it on the bottom of the frame, again using mod podge. I thought about applying it all the way around the frame, but I think it would've been a little overkill. After all was dry, I went to my amazing Silhouette Cameo and created the text for my copy-cat masterpiece. Once it was applied, my sign was complete and I was quite pleased with the results! The ribbon is a little long and I didn't cut it down quite enough and some of the vinyl is a little cockeyed in spots, but I am settling for the time being because crafting with a two year old and an infant means you have to settle for a while from time to time.

My other project was for an online auction that my MOPS group was putting on. I have actually made a few of these and I love them. A friend of mine made one and I just had to copy her idea and make it my ownself, plus I found it on Pinterest so I was determine to make it too.
 |
| Photo from Pinterest |
So for this project, you just need:
A deep set 8x24 canvas
Paint color of your choice
Paper or vinyl
Mod Podge
I wasn't crazy about the red background, so I changed that up a bit this time (I'm a rebel!) and went for a dark night sky blue. I painted the entire canvas including the outside edges.

After that was dry, I took the paper that I had purchased (sparkly silver paper) and cut it out, again, using my fancy cutting machine - the Silhouette Cameo! Seriously, that machine is AMAZING! After it was cut, I placed the cut-outs on the board to my liking, then I mod-podged them down on the canvas. Be careful not to use too much mod podge as it can leave a little white glaze on the top of your canvas, but for the most part that doesn't happen.
I have actually made this sign a number of times as gifts and I used a different technique each time to see which way I preferred. So, here is what I learned: Once I used glitter spray paint and painted with that first, then I applied a vinyl of my cut-outs, painted over the top and once it was mostly dry, peeled off the vinyl. This I wasn't as excited about as it left the print looking a bit sloppy or unkempt, in my opinion. (See bottom sign in picture) Then I've tried applying mod podge to the entire canvas after the cut-outs have been applied. This leaves a nice glaze on the sign, but the glittery paper isn't quite so shimmery. If you had nothing to compare it to, you'd never notice though - it still has plenty of shimmer. (See middle sign in picture) and then I've just used glue or mod podge for the cut-outs and left the rest alone. This works well, though sometimes the glue leaves a bit of shine if it's outside of the cut-outs. (See top sign in picture) Either way, I prefer the second or third method over the first.
 |
| 3 different examples |
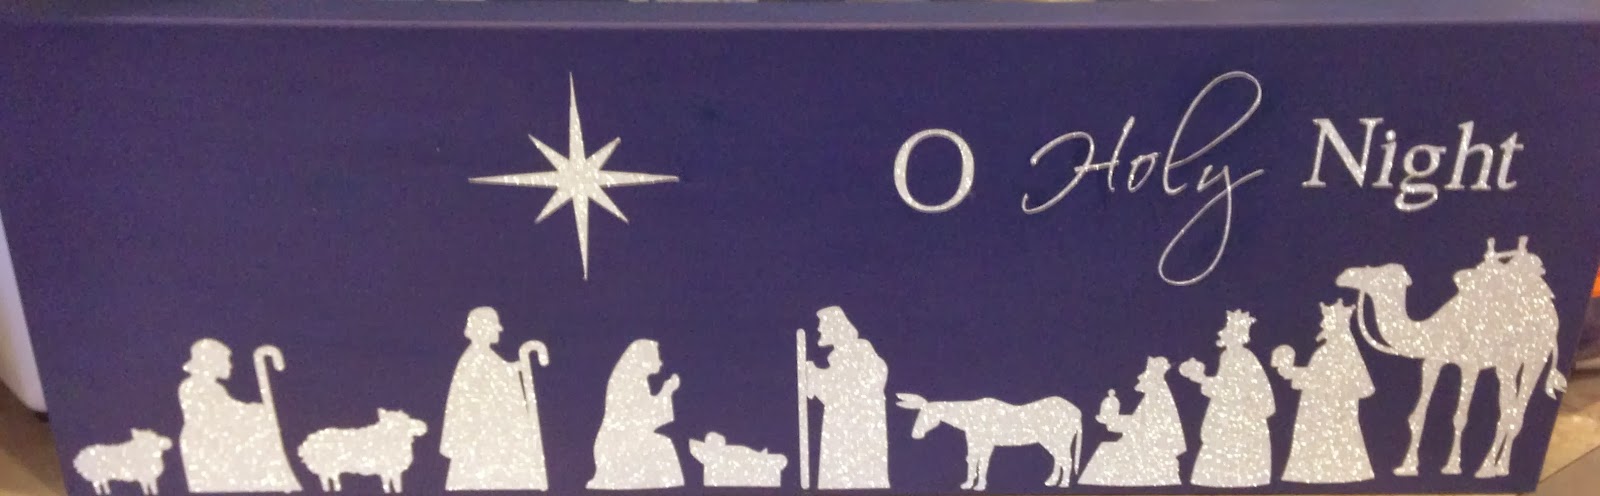 |
| 8x24 Sign |
 |
| 12x24 sign |
No comments:
Post a Comment