This trip, I decided to geek out even a little more than normal and made myself a minnie mouse skirt that would match an outfit that my daughter was wearing - making it a picture perfect opportunity when meeting the lovely Minnie herself! The blog I used for inspiration can be found here.

This project was very simple...but felt very complicated because of the directions in the blog and my non-sewing language brain. Thankfully, I had my momma (an amazing seamstress) to help me out. In the blog I linked above, the directions were not near as simple as I needed. I am a bit dense when it comes to my sewing abilities and knowledge.
I didn't have any newspaper, so I used some excess tissue paper my mom had on hand, which worked wonderfully. Here is a basic run-down of what I did to start (because the directions in the blog above didn't make as much sense as I would've liked, I'm spelling it out for you as best I can):
1) I measured my waist (where I'd want the skirt to sit rather than my natural waist).
2) I decided what length I wanted the skirt to be and added 2 inches to that.
3) I laid out the tissue paper, made a curved line half the length of my waist.
4) from the inside of the curved line, I took the tape measure and pivoted it, measuring out the length from all points - making the pattern piece a-lined rather than straight.
5) I cut out the pattern and pinned the skirt material to it. (The material was folded in half length-wise.)
6) Cut out the fabric using the pattern.
7) Flip the pattern over and do the same thing on the unused part of the fabric.

After your pieces are cut, you are going to put them right sides together and sew up both sides so that you will then have a complete piece. Remember to backstitch when you start and when you finish both sides.

After both sides were sewn, I ironed the seams flat. If my mom hadn't been there, I probably wouldn't have done it, and it wouldn't have turned out as well. I'm glad my mom knows what she's doing and doesn't take as many shortcuts as I do. ;)

Once the ironing was done, it was time to add the contrasting fabric. In order to do this, I had to cut the fabric into 6 inch strips. I ended up with three sets of 6 inch strips. I pinned them together (right sides together again) and sewed the seams again. From there, I ironed out the seams and folded the fabric in half length-wise and ironed it again. (Sorry, I was too distracted and didn't remember to take pictures of those steps.) Once all the ironing was done, I put the non-ironed edge of the contrasting fabric against the bottom of the skirt and pinned them together.


Once they were pinned together, I got to work sewing all the way the around the skirt to attach the contrasting fabric. Then I ironed it all out yet again (thanks, mom!).
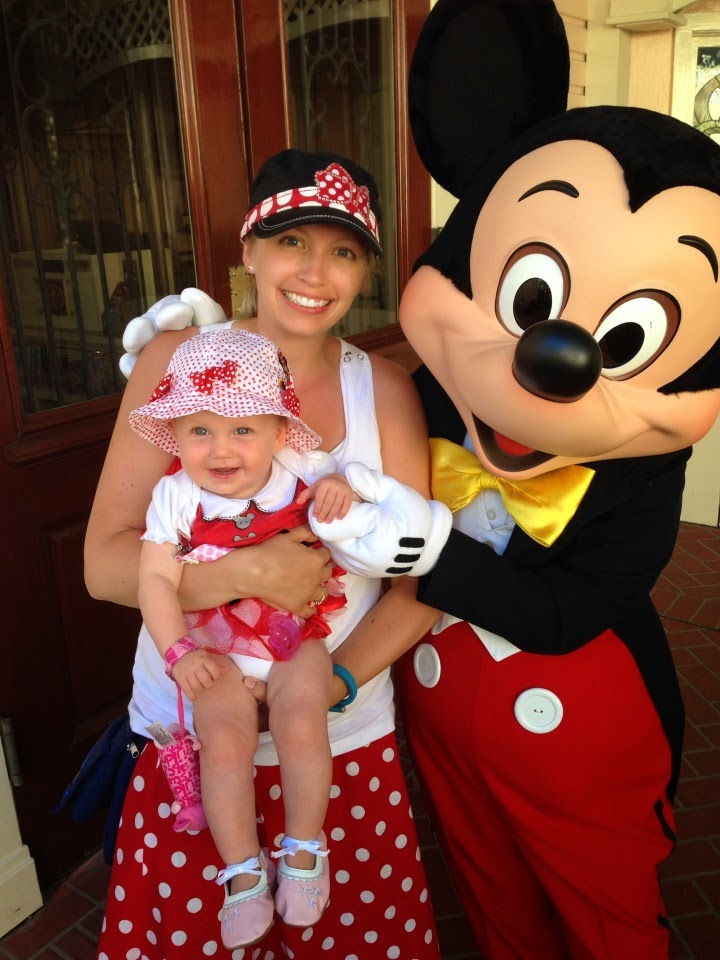
From here, I stopped following the directions given on the blog above. I went to my previous blog post and just added in elastic. This was much simpler than trying to do a zipper and it still worked out just as well, if not better, in my opinion. I did not make the elastic very tight - I'm not big into the whole muffin top look. But, it was tight enough that it wouldn't fall off, which was the goal. :) Here it is, the completed product!

It worked! The skirt was worn at Disneyland. It was comfortable, it stayed up, it was complimented on and it was picture perfect. There you have it! Another simple project. Seriously. Way simple. If I can do it, anybody can do it. And it was all done in less than 3 hours (total).

No comments:
Post a Comment