Thursday, August 14, 2014

Eggless Chocolate Chip Cookies

Much to my delight and happy heart, my family - siblings, mom, nieces, nephews, and of course my husband and children, went camping. It was a glorious weekend filled with fun and food and games and rest and more food. Oh yeah, that's my kind of vacation! I love to eat. Have I said that before? I'm pretty sure I say it an atrocious amount of times. 

Anyway, my job was to bring cookies and veggies. Veggies were simple - just cut them up, bag them and keep them refrigerated. Cookies, on the other hand, was just a bit more challenging. Although, more just by my own volition. My brother is allergic to eggs. My go-to cookie is the best homemade cookie in the world: the chocolate chip cookie. However, it has eggs in it. And, although my brother will take one for the team and eat them with eggs and sacrifice himself getting sick (yes, he could just not eat them, but that makes far too much sense) :), I decided not to put him through that rough decision and instead tried making these, eggless chocolate chip cookies. 
Photo from Pinterest

The recipe was very simple. I did not take any pictures of the process as the blog linked above is a great picture tutorial as well as being easy to follow. I did not have a problem with my cookies being dome shaped as some seem to have had from the comments in the blog. And, because I like shortcuts and am a wee bit lazy at times, I tried not rolling the dough into a ball and rolling it, as suggested in the blog.  The cookie on the top was not rolled, the cookie on the bottom was rolled. The only difference is that it doesn't look as even...so, not as pretty.

These were very good cookies. They aren't as good as egged chocolate chip cookies - but they were still decent. The biggest problem I had with them is that they don't travel well. Before the end of our weekend camping trip, they were all crumbled into a million pieces in the ziplock baggie. However, as I type that, I'm realizing that could also be because they were in a ziplock baggie....

Anyway, they turned out alright, but certainly weren't the best. But, my mom, who for many, many years has been on the search for a good eggless chocolate chip cookie recipe for my brother said these were the best she had ever had. So, there's that. If you need eggless, give them a try. I don't think you'll be sorry. :)

And with that, here are some pictures from our campout.

While we were there, we celebrated my mom's birthday - and I made all of the siblings (and mom) matching shirts. Because I'm dorky like that.
My son swinging
Elsie's first experience on a swing. She loved it. And her brother and cousins were begging to push her. This would be a good photo to caption "look out future boyfriends - this girl's got bodyguards..." :)

Before we left we went on a lovely hike and enjoyed the cool morning and the beautiful Santiam river. So much fun.

Tuesday, August 12, 2014

We Give Books

I'm working through some super old pins in my Pinterest account and have found some really interesting things. One of the pins I just (re)discovered was this awesome website, http://www.wegivebooks.org.

Photo from Pinterest
In order to use this website, you do have to register, but it's pretty hassle and pain-free. None of this "please enter a symbol, number, capitol letter, and an accent to create a password" bologna. It was straightforward and quick.

Once I signed up, I was excited to get reading with Cade. You read the books through the site itself, so you aren't downloading anything. They have some great books. The toughest part was navigating to the books. Up at the very top (in the black bar), you'll want to click on the button "read." From there, you will see lots of books options based on age (anywhere from 0-10), genre, author, classics, etc.  I went to the age range 4-7 and found a few "Llama Llama" books as well as many, many other options.


After I clicked on the book we wanted to read and enlarged it to fit the whole screen, the reading began. This book seems appropriate for my little nudist son...

So, there you have it - an awesome website with so many books to read online! This'll save you a trip to the library when your day is already full. Happy reading!

Wednesday, August 6, 2014

Binkie Bag

Back when Cade was a baby, I had seen this blog about making a binkie bag. I never managed to get it done before he outgrew the binkie. I had many excuses: time, supplies, my sewing skills are embarrassingly lacking, fear of messing it up and frustration.

Photo from Pinterest
But, after a nightly struggle of finding her binkie as Elsie woke crying after managing to throw every binkie she owned behind her crib, I finally decided the excuses and frustration would be minuscule in comparison to being awake at 3 in the morning, searching in the dark for the discarded binkie. This is proof of the binkie disappearances as I found them behind her crib while changing her sheets.


This project was ridiculously easy. I didn't measure the fabric precisely or cut straight, but it was totally fine! I loosely measured the fabric and then eyeballed to actually cut it - mainly because I didn't want to go searching for anything to mark my fabric with.


Here it is once it was cut - in all it's uneven glory.


Once it was cut, I folded it in half, right sides together, lengthwise.


Then it was time to sew! I stitched up two of the three sides and left a one to two inch opening that wasn't stitched at the top so that it could be folded over for the sewed hem.


Then, I folded over the fabric and eyeballed the fabric as I sewed the hem. I didn't even use pins for this part or anything, I was being really lazy.


Voila! It's a bag!! Now to add the ribbon and the boning.


When I added the ribbon, I did use pins - there was no way it would look good without. And I changed out my thread so that it would look better. I know; I went all out for that part. ;)

I stitched as close to the hem line stitch as possible to continue to allow room for the boning to go in. And left the end open with a long tail for the ribbon to be tied to the crib.


Then, I inserted the boning (which you can find near the thread and ribbon at the fabric store) - the most time-consuming part of this project. And that was nothing.


I then stitched up the end where the boning was inserted so that it wouldn't wriggle its way out. And it was done!

Ok, all of my fears and excuses shouldn't have stopped me. This was, by far, the easiest sewing project I have ever done. Simple. Quick. Fun. TOTALLY USEFUL! I love this. Lesson learned - I should try things before I get too worried about them. This is awesome. This is most definitely a Pinterest success!


Wednesday, July 30, 2014

Cheesy Ground Beef Rice Casserole

So....this post is going to be boring, unimaginative and brief. My brain doesn't want to work so hard to be creative, so I'll write within the capabilities of my tired brain and call it good. Get ready for short and sweet. 

Photo from hungrylittlegirl.com
I didn't have any sour cream, so I used plain greek yogurt. I didn't care for the taste of the greek yogurt all that much in it, but it worked. I also didn't read the directions closely enough and put the greek yogurt and cheese in before I popped it in the oven. So, the picture of my dish vs. the one above doesn't look near as tasty. Oh well.


After it was all baked, I plated it with some steamed veggies and we ate.


This was delicious, although next time I will try it with sour cream and add it in at the right time. My husband thought it was a bit too cheesy, but for those who love cheese, this is definitely a good meal and it doesn't take too long to make.

Thursday, July 24, 2014

Sticky and Sweet Slow Cooker Chicken

I know I've said it before, but why do I not think to use my crock pot more during the summer? It doesn't overheat the house and you still get some mighty tasty meals. I tried a new recipe in my crock pot the other day. Sticky & Sweet Chicken Drumsticks.

My husband is the master griller, but we were on a tight schedule the other night so I knew there wouldn't be time to stoke up the BBQ and get the meat all grilled before I needed to leave, so this was the perfect alternative.


The preparation wasn't too hard, and I actually pulled the chicken out of the freezer and put it directly into the crock pot. The time-consuming part was making the BBQ sauce. You certainly don't have to make your own sauce, I'm sure, but I thought I'd try it out. 


After the sauce was made, I poured it on the chicken and turned the crock pot on high. The recipe calls for covering the chicken in the sauce and making sure it's all mixed in. 


I turned the chicken and made sure to smother the BBQ sauce all over the meat about halfway through since I wasn't able to do it in the beginning with the chicken frozen solid. I had it cook for a little over 4 hours on high since the meat had been frozen. I don't think that was necessarily a good choice; the meat wasn't very juicy by the time all was said and done. But, it smelled amazing.


After the chicken was broiled on both sides, we served it up with some yummy salad, rolls, watermelon and pasta salad.


This dish was beautiful and tasty and summery. In the future, I may not cook the chicken for as long since it was a bit dryer than I would've liked, but it still turned out quite delightful. Sweet and, indeed, sticky, but yummy! 

Friday, July 18, 2014

How To Shuck Corn

Do you remember when you were a kid and you watched your mom (or dad) shucking the corn off the cob and would beg to do it, and then once you started you were immediately tired of doing it? Or, was that just me? The worst part was the little tiny corn hairs (I totally had a moment of forgetfulness and couldn't remember the name of that stuff! It's corn silk by the way!) that seemed to stick like static to the corn or to your arm, your fingers, your...well, just anywhere that it landed it seemed to just cling. So, as I grew older I grew smarter (except for the occasional brain fluffs - "corn hair"? really?) - I quit begging to do it and began hiding while it was being done, frequently unsuccessfully. 

As the main meal maker in my home, I have now reached a time in my life where I am having to shuck the corn. My husband is gracious enough to help me when he's available to do so and my kids haven't reached the age where it's fun to do it - or at least it appears to be fun to do. So, I work real hard removing every last strand of corn silk. Until today. No more do I work real hard on this. 


Thanks to the Huffington Post, you don't have to anymore either! Check out this video for a more visual description.

No peeling, no mess, no heating up the kitchen. Stick the whole ear of corn (I did one at a time) in the microwave, set it on high and cook for 3 minutes.


After the microwave dinged at me, I used my ove-glove (although you could use a regular pot holder if you don't have the awesome ove-gloves (aka grill gloves) ) to remove the corn from the microwave. It will be very hot.


After you remove it from the microwave, cut off the shank (the end that doesn't have the hair) and a little of the corn. Then grab that corn by the peel and the silk and give it a super good shake. It pretty much just falls right out, although I did have a time or two where the corn didn't shake out very easily. Nuking it a bit longer probably would've been a good idea at that point, but it eventually did come out after many brutal shakings.

 
I did this with 8 ears of corn and out of the 8, 2 were a little more difficult to remove - nothing as challenging as peeling without this step though. This was fantastic.

At this point, the corn is cooked and you can eat it, although I prefer the way my mom cooks corn, so I proceeded to boil the corn with a little lemon juice and a pinch of sugar and they were delish! 

And now you know the secret to shucking corn. I don't know that shucking corn has ever gone this smoothly or quickly before. I will definitely be doing this again. 


Tuesday, July 15, 2014

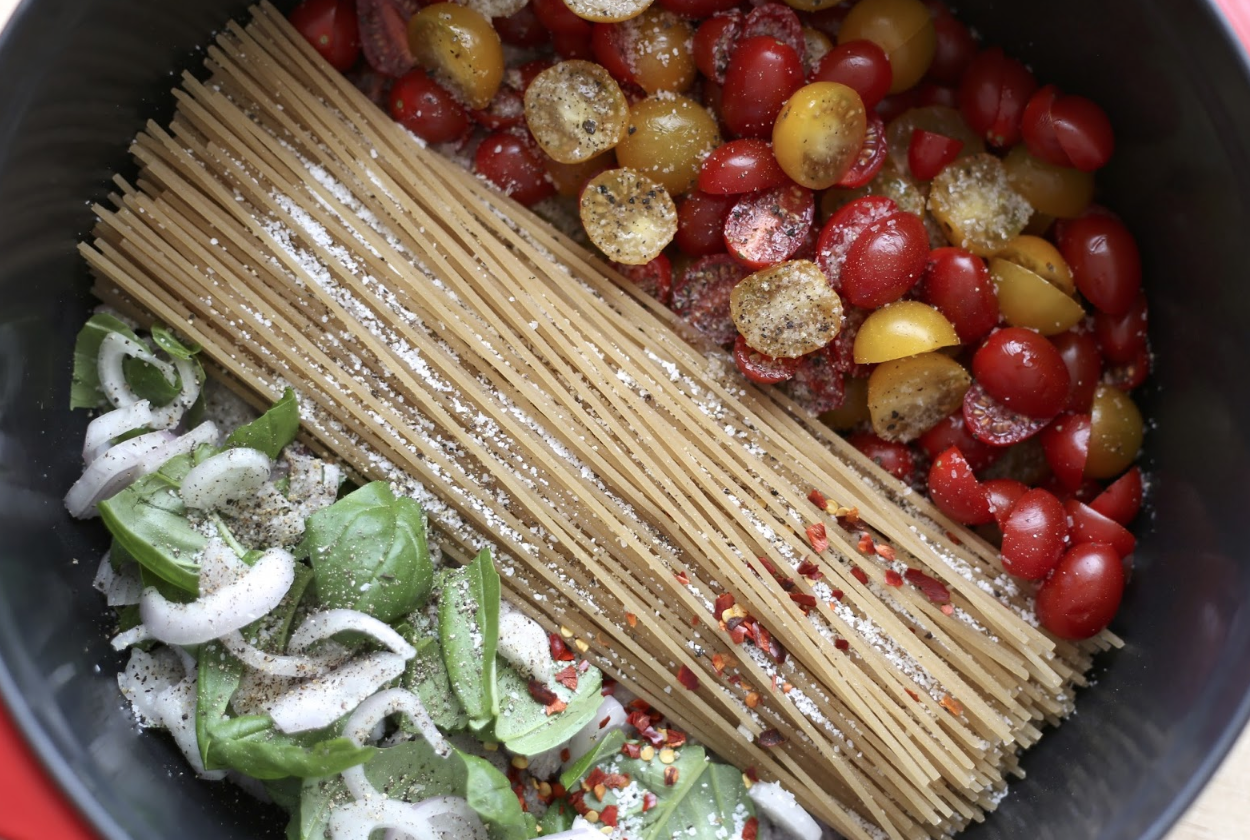
Cheesy One Pot Pasta with Parmesan and Pine Nuts

Awe dinner...I have a love/hate relationship with you. I LOVE to eat, but coming up with a plan of what to make at last minute - I hate. This could always be avoided if I would just sit down and plan out my meals for the week, but alas, my organizational/scheduling skills have not attained this level of greatness in recent years. Thankfully, there is this great site called Pinterest that helps the procrastinator in me. I discovered this recipe a while ago and since I had all the ingredients, I gave it a try. To check out the recipe, go here.

Photo from Barefeet In The Kitchen's Blog
This was super quick and took little preparation. The most time-consuming part of the preparation was cutting the tomatoes, shallots (or onion) and basil, which took just a few minutes.


30 minutes, start to finish and this dinner was ready to go. It was delightfully simple and tasty. It had a little kick to it from the red pepper flakes, but it was kind of a nice addition to the dish.

Barefeet In The Kitchen's blog says that this is really creamy, but mine didn't turn out quite as creamy as I had hoped/expected. I may not have put in enough cheese though. I definitely liked the added crunch of the pine nuts though. That was uber tasty. Highly recommend doing that.


In conclusion: Simple recipe = happy mama. Yummy recipe = happy daddy (and everyone else). Quick recipe = happy kids. Yay for another Pinterest win!