Thursday, January 30, 2014

Slow Cooker Chili

This will be a blog post about food. It will not be from a recipe I found on Pinterest, but rather, a recipe of my own design. One that I find to be incredibly tasty and I thought others might appreciate as well. A number of years ago, I was looking for a tasty chili recipe that was quick, easy to make and would be ready when I walked in the door when coming home from work. In the process, I managed to collect a few different recipes from friends and kind of mishmashed it into my own award-winning chili. Ok, it's not award-winning. HOWEVER, many moons ago, my dad entered his chili into a cook-off and it won, so I am believing that I have inherited his chili-making abilities and have found yet another award winning chili. So, without further ado, here's my slow-cooker chili recipe:

Ingredients:

  • 1 pound ground turkey or ground beef
  • 1/2 medium onion, chopped
  • 1 (8 oz) can of tomato sauce (not paste!)
  • 1 (15 oz) can kidney beans
  • 1 (15 oz) can pinto beans
  • 2 (15 oz) cans black beans (or your choice, these are just my favorites)
  • 2 (14.5 oz) cans diced tomatoes, undrained
  • 1 clove of garlic, minced
  • 1 (14.5 oz) can corn
  • 1 green pepper, chopped
  • Chili Powder (I don't measure this, probably about a tablespoon - but just to taste)
  • Cumin to taste
  • Salt and Pepper to taste
  • Shredded Colby Jack Cheese
Directions:  Start by browning the meat and onion together. While those are browning, add all other ingredients (except the cheese) into the slow cooker. Once meat has browned, add to slow cooker and stir. Cook on low for 8 hours. Dish up into bowls, add grated cheese and you are good to go!


Right now, I am going dairy and soy free, and as long as you don't add cheese - this meal can be that for you as well! It's tasty, comfort food at its finest. I hope you enjoy it as much as we do. I generally make corn bread to go with this meal, but I didn't this time, so it's not very fancy looking. But that's ok. It still tastes super.

PS - have you tried the slow-cooker liners yet? They are truly amazing! I mean, seriously. They are incredible. You can make a pot of chili, throw away the liner and never have to scrub your slow cooker again! It's awesome! If you are interested in getting them, check them out here.


Sunday, January 26, 2014

DIY No-Pattern Pajama Pants!

A few years back, my husband and I decided to start the tradition of giving each other and our kids pajamas on Christmas Eve. Well, one day before Christmas this last year, as I was at the fabric store, I found some great OSU Beavers and Pittsburgh Steelers fleece fabric. When I saw the fabric, I could just imagine my husband and my son in matching pajama pants sitting by the Christmas tree opening presents and looking as cute as ever. I decided at that moment that I had to make them pajama pants. Seeing as how I am one of the most inept seamstresses around, this was quite a challenge. Or, so I thought. Because of the challenge that was presenting itself, plus having a new baby, I ended up not getting them done for Christmas, sadly. I was too intimidated to do it without my mom's help and she was busy herself and unable to help (although we both had the best of intentions to do that). So, my husband ended up with store-bought plaid pajama pants and my son got an adorable Mickey Mouse robe. Fast forward nearly 2 months, and I finally became brave enough to try making the pants on my own. To see how to make these yourself, check out this blog. And this blog. They are pretty much the same, but seeing the pictures for both helped me a lot.

Photo from Pinterest
If you aren't a seamstress - don't stress too much. I am not either. Seriously. I cut crooked, I can't read patterns (although my mom has tried to teach me countless times), and I don't know how to do beautiful, fancy stitches with my sewing machine. All of that to say, if I can sew these, I'm fairly certain anybody can make them...as long as you have a sewing machine. Well, you could make it without, but I can't help you there.

One thing that both of the blogs didn't spell out for me and, because of my ineptness for sewing and post-pregnancy-tired-mama brain, I needed spelled out, was that you have to cut each leg out (duh, I know.). Anyway, because of this and how wide my fabric was, I was able to lay my fabric down, with the ends of the fabric meeting in the middle so I could lay the folded pajamas down, cut and then flip them over onto the other side of the fabric and cut again.


Once it was all cut out, you should have two pieces similar to this while they are still folded up.


At this point, fold them right sides together and sew the straight side with both legs.


Then comes the other part that was confusing for me. Turn only one pant leg right side out, and then put it inside of the pant leg that is still inside out - so the two legs have the right sides together. To understand this better, read the blogs posted above. I didn't take a picture, because I personally didn't think the pictures helped. I just had to re-read the statement a number of times to get it. Once you have that figured out and you have the pant legs together, sew the "u" shape that the fabric is in. Then, you are almost done! Woohoo! All you need to do now is to add in the elastic!


Because I was sewing fleece, and you can't really iron it as the blog above describes, I just folded my fabric, pinned it and started sewing.


I was not careful to measure or anything like that. I just eye-balled it. And that seemed to work just fine. Be sure when you start sewing, that you leave an opening for the elastic to go in. 


To make it easy on yourself when adding the elastic, use a safety pin. I didn't do this and it took a whole lot longer to get the elastic through it. Seriously. Do yourself a favor and use a safety pin. Once you get the elastic all the way through, try them on and pin the elastic where you are going to want it.


At this point, I sewed my elastic together so that it would stay where I wanted it. Because it was going inside the pants, I wasn't worried about it looking pretty...just get it sewn so your elastic stays secure.


After that, I hemmed up the pants and the sewing project that I feared for too long had been concurred, and looked pretty good for that matter.

There he is folks, my husband, peacocking. :)
This project, literally, took less than an hour to make! So easy, quick and fun. I may never buy another pair of pajama pants again! By the way, I did follow up by making my son the same pants. He looked pretty adorable his ownself. As I made the pants for my son, my husband recorded it so I can have it on my upcoming vlog, hopefully. But, as a teaser, here is my adorable son in the pajama pants I made for him. I apologize for the fuzziness of the picture. Getting him to hold still was too much of a challenge, so I give you a picture of fuzzy-Cade.


If this was not helpful enough for you to get started, you'll have to check out the video blog when it's done. That'll show you step-by-step with movement. :) I'll keep you posted for when that happens. Until then, don't be afraid to try something new! You may just surprise yourself.


Friday, January 17, 2014

DIY Magnets

This is, yet again, another edition of not-actually-something-I-found-on-Pinterest posts. A few years back, while attending MOPS, we made these adorable round fridge magnets. It was so simple and enjoyable, I've been making them frequently as gifts ever since. (If you've received these as gifts, it's because I care - not just because it's easy...seriously...it's also because I like you enough to make you a gift instead of just buy something). :) Here are some that I have made in the past. Aren't they adorable?


For this post, I will show you how to make some that I made recently for an online auction. I made OSU (go Beavs!) and UofO magnets. So, what you will need is:

Paper of your choosing - I found a book of stock paper on sale for the magnets above, for the magnets below I, obviously, paid for individual pieces of paper.

2" Hole Punch - this is the most expensive part of your purchase (and it isn't even that pricy), it has come in handy on multiple occasions for me.

Button Magnets

Mod Podge (which is what was used for the magnets above) or Glossy Accents Glue (which is what I used for the magnets below)

Clear Accent Gems (like you would find in a fish bowl or flower vase). These are on sale at craft stores frequently.


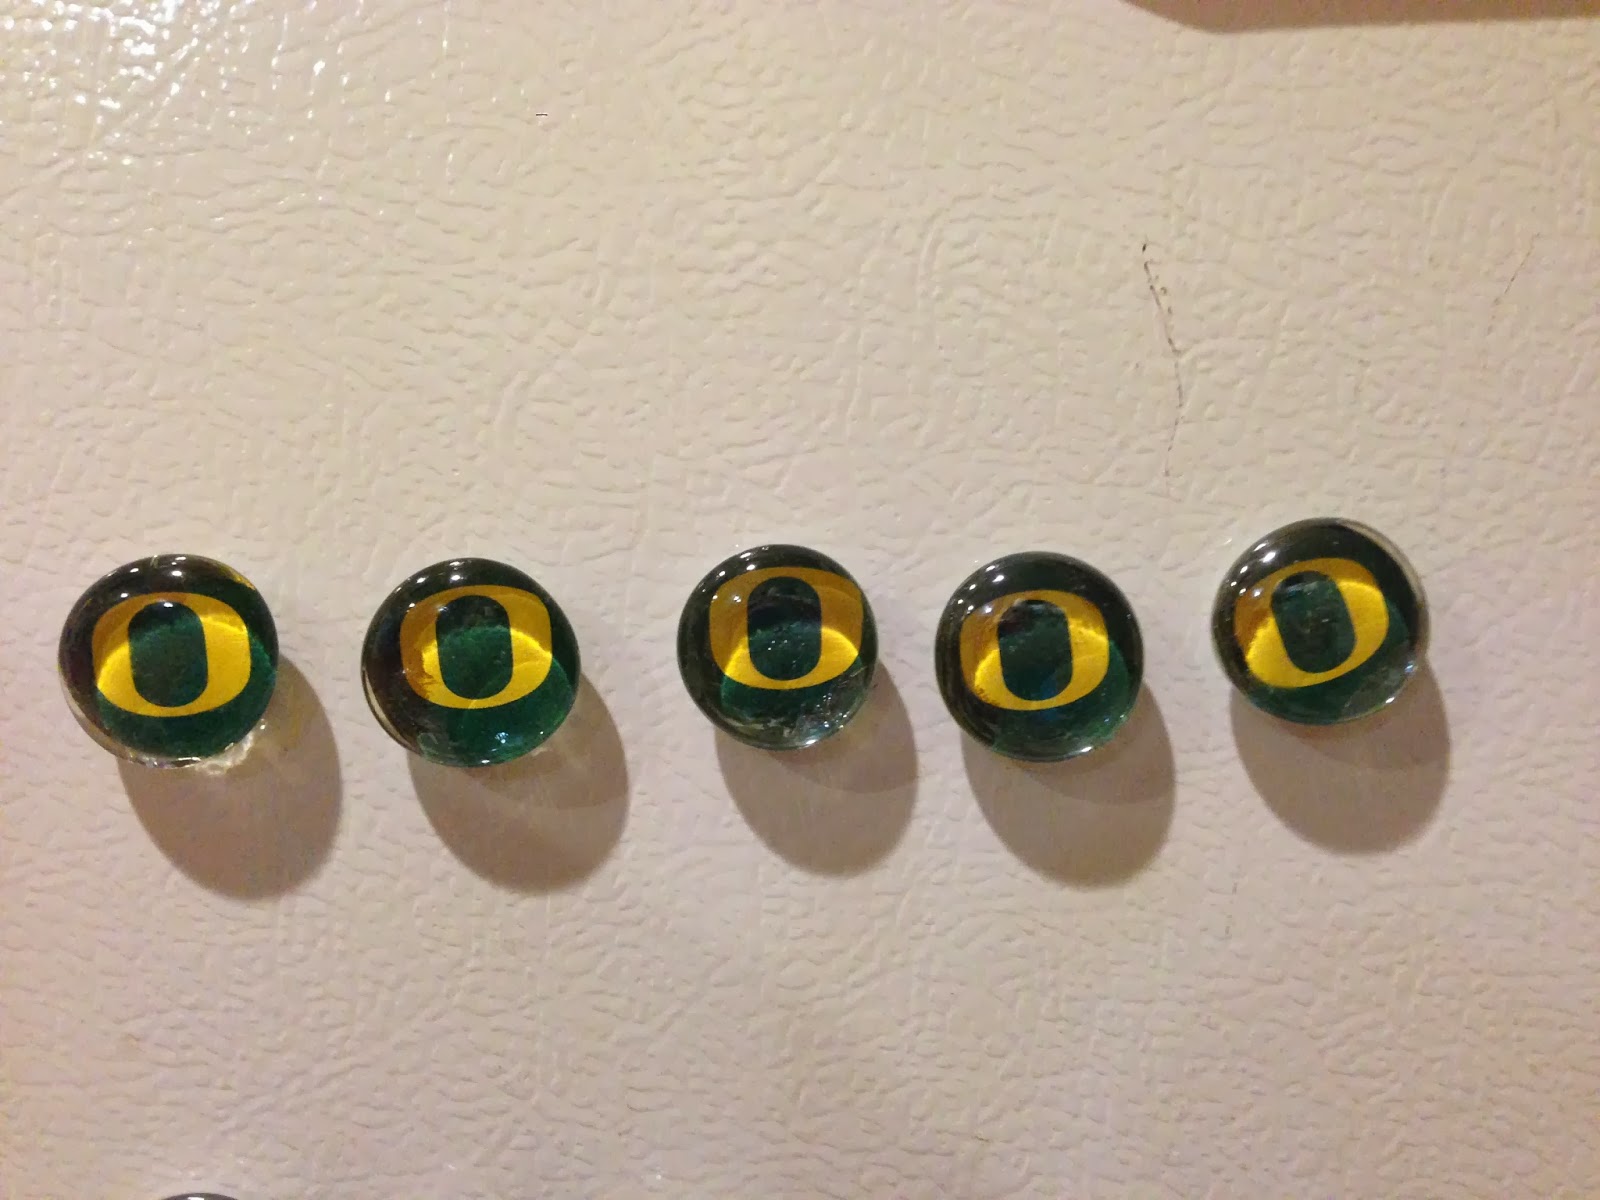
Once you have all of your supplies, start by taking off the back of the hole punch so you can easily collect your round pieces of paper, line it up where you want it to punch out and punch away. Put a little of the glue adhesive on the gems and lay your paper down (the glue should be on the side of the paper you want to see). Then, apply your magnet to the back. That's it! Easy-peasy! My 2 year old son actually helped me make these - it was that easy. He applied the magnets to the back for me and even with his assistance they work wonderfully! I like to put 5 in a cloth bag and give them as gifts. It's fun, easily themed, simple and nice because it is home made! I have made these with family pictures in them as well. Those are way fun (but far more time-consuming) and my mom still has some on her fridge!

And for your Duck fans...here you go!


And, as I said before <ahem> GO BEAVS!

Wednesday, January 15, 2014

Cleaning Your Stovetop

My stovetop looks gross so much of the time; dried on food splatters that are really hard to get off, boil-overs that leave an unsightly brown speckled covering around the burners. Just ugly. So, I tried something I saw on Pinterest. Unfortunately, not all things that are tried on Pinterest are successes. I would not count this as a success. I suppose I shouldn't warn you prior to reading the rest of this blog for fear that you will stop at this point - but I'd hate to get your hopes up for nothing.

Photo from Pinterest
I tried to go to the blog to read the instructions, but the morticianswife's blog is private, so I had to go with the description given on the pin:

Photo from Pinterest

I did my best to follow these directions, but it didn't work wonderfully for my stove. Here is a picture of the burners prior to cleaning.


During the cleaning process, I had areas full of peroxide with little baking soda and other areas with pretty much just baking soda...maybe my house is lopsided...anyway, it wasn't easy to get the right formula amount to clean the burners by each burner. (Did that sentence make sense??)

Prior to adding the peroxide

After adding the peroxide, I let it set for a few minutes and then tried to clean it all up. It didn't work as wonderfully as I would've liked. My burners may have been a bit cleaner, but they now had residue from the leftover baking soda wedged into the crevices that I couldn't get into. Below is the, rather fuzzy, after picture of the stove. The burners were a bit cleaner, but with the bakings soda residue, I'd say it wasn't worth it. My husband started wondering if there was something wrong with our stove as he was seeing white stuff in the burners...he didn't know I had "cleaned" them. So, yeah, maybe with a different kind of stovetop this cleaning method would work better. Or, maybe if I had understood the directions a little more clearly? I don't know. But, with the stovetop that we have plus my post-pregnancy, can't-think-too-hard, going-on-little-sleep brain, it wasn't awesome. 


Thursday, January 9, 2014

How To Cut An Onion

Who knew that there was actually a proper way to cut an onion? I had no idea...until recently! Thank you, Pinterest! To see how to do this for yourself, check out this blog.

Photo from Pinterest
So, the other day I posted a terrific turkey soup recipe, and in the process, I did a double-whammy Pinterest Test, because I did this test as well!

Just follow the steps on thankyourbody's blog, and you will be thanking me for sending you to their blog. Isn't it funny? Rather than coming up with my own special stuff, I use other people's...definitely not very original. Oh well, you can thank me for sending you to thankyourbody's blog anyway. :)

This was seriously no harder than cutting an onion any other way, in fact, it made it easier for keeping the onion together.


See how nicely it stayed together? Only the cuts at the end fell apart. And, not only that, it seems I usually lose a lot of my onion when taking off the skin (is it just me?). This prevented that as well!

I don't generally like big slices of onion, so I then cut my onions again and since onions have layers (as anybody who has seen Shrek knows), the layers were already individualized anyway, so this just made my cutting that much easier!


Seriously! This took no time at all and it was so much easier. Yeah, you should do this...unless you have a skill for knife-weilding...then you keep doing it your way. I, however, do not. And this was terrific.


Tuesday, January 7, 2014

Homemade Turkey Soup

If you still have leftover turkey, have I got a mouth-watering recipe for you! I found the PERFECT recipe for leftover turkey. I have made it three times since the end of the holidays (with 2 different turkeys) and am in love with this recipe. I, of course, found this recipe while searching Pinterest for something to do with my leftover turkey. Check it out here.

Photo from Pinterest
We definitely modified this recipe quite a bit, but the results were wonderful. Here's what we changed:
We didn't actually have celery on hand, so I used celeriac (which is a root vegetable that tastes very much like celery).
We added kohlrabi, which tastes a lot like broccoli (and is so very tasty). Pretty much, we altered this recipe by adding any veggies that we felt would be good in it.
I didn't have turkey broth on hand, so I used a few cans of chicken broth. The result was still quite delightful.
I cooked the pasta separately, which made a huge difference for not sopping up all of the soupy goodness.

Those were the biggest changes I made. I'd highly recommend this dish. It was tasty and warm and just a really good comfort food. I think next time I make it, I will add in one more can of broth (I have been putting in two, plus water) as it could still use a little more liquid. But, overall, this was definitely a Pinterest win that I hope you all will get the chance to enjoy sometime.


Friday, January 3, 2014

Removing Permanent Markers From Clothing

First thing's first: Happy 1 year anniversary to my blog!! One year ago on the 1st, I was starting my Pinterest Test and here we are, a year later, still going strong! My original goal had been to do at least three posts a week and ended up averaging more like one with being pregnant and having a baby and all. But, I think I'm finally getting the hang of it....maybe. So, this year, I will strive for three posts a week!

The other day, as I was labeling all of our wrapped Christmas presents, I not-so-smartly gave my son a sharpie to "help" make the labels. In the process of doing so, he managed to mark up my sweatshirt I got as a memento when I saw the show "Wicked." It's a fantastic show, and my mom spoiled me with this gift. Anyway, much to my dismay, I ended up with blue ink on my nice grey sweatshirt. 

Sad day!
Thankfully, a friend of mine posted this image on Facebook just as I was about to burst into tears. It's like they knew I needed it! I looked up the image on Pinterest to see if I could find more details, but it was, again, just an image (at least the one I looked at.) So, I gave it a try. 

Photo from Pinterest

I got my handy-dandy hand sanitizer out and I put it on the stained spot on my shirt. 


I scrubbed quite a bit, but before I had even washed the sweatshirt (other than with a good dousing of hand-sanitizer) the stain was coming out. I should mention, I did not wash the shirt before using the hand-sanitizer, hoping that the stain wouldn't set, so that may have helped my cause.


After I scrubbed the sanitizer in and noticed the stain was gone, I threw my sweatshirt in the wash. Out it came with just the tiniest spot of blue on it. I can handle that. Overall, I'd call this test a success. Now I know hand-sanitizer removes permanent marker mostly (if not all the way with a bit more scrubbing) from clothing. There you have it. The more you know. :) Happy New Year!!


Also, a quick survey: is there anything you'd like to see in my blog? Anything you'd rather I didn't write about? Are you interested in guest-posting for my blog? Is there anything you'd like to see me try to make? I'm looking for tips, feedback and all that sort of thing. I'm happy just challenging myself to keep writing it, but if you are reading this and have some feedback, I'd love to hear it. :)