Monday, September 30, 2013

Eggplant Parmesan With Easy Homemade Sauce

In our CSA Produce Box this last week, we ended up with eggplant. I don't know that I have ever intentionally eaten eggplant. Not because I have anything against it. I've never tried it to feel one way or the other...that I know of. So, I was baffled as to what to do with these purple gourds. I started my search on Facebook. I bet you didn't expect me to say that. hehe. I discovered many of my friends raving about Eggplant Parmesan, so that became the winning dish for the evening. Thanks to Pinterest (and allrecipes.com) I was able to find a terrific Eggplant Parmesan recipe - which you can check out here.
Photo from allrecipes.com
I didn't make my recipe with noodles, I figured since I was trying to eliminate carbs, I shouldn't add them back in to this lasagna-style dish. I modified the recipe slightly and added mushrooms to the sauce. We had mushrooms that needed to be used up, and I'm always happy to add in some of that goodness. Hate me if you want, but I am a mushroom-lover. The food. I love the food mushrooms. Nevermind...I should stop while I'm ahead.


After baking the eggplant as directed in the recipe and placing them in the pan, I was ready for the sauce to be lathered on top. By the way, as the eggplant was cooking, I made the sauce. My kitchen stayed rather toasty, so this is a recipe I'd recommend making on a day that isn't in the 80s or above...especially if you are pregnant. Wooey, was I warm.


After putting all the cheese on, I popped this baby in the oven. It didn't look like much to begin with...


But, BAM! Look at it now!! Oh my goodness. It still looks delicious. Sometimes I wish this was like Willy Wonka where I could just taste the food through my computer. You know, like the wallpaper that you lick? That sounds way more disgusting now that I've written it...act like I didn't say that.

This dish was absolutely a success. My husband liked it (although I did have to pick out the mushrooms for him. He does not have the same love for them that I do). My son even seemed to tolerate it for the most part. We had a bunch of leftovers, which my husband ate. However, he says it is definitely better eaten fresh. Now that I've tried eggplant, I may try it again. This was a successful, tasty, satisfying dish and kinda healthy too! If you've never had eggplant, this would be a good place to start. And, if you have had eggplant, well, you should try to anyways.


Friday, September 27, 2013

Coffee Filter Leaves

Looking for a nice project to do with your kids to welcome in fall? Here's a fun one: Coffee Filter Leaves.

Photo from Pinterest

I made this last year a few different times - once with my niece and nephew and once with some of Cade's "big sister" friends. I don't have pictures of the kids as they did the project, because this was before I started my blog - so we only have the end result, but hopefully that'll be enough.

Playdrhutch's blog suggests getting a leaf from your yard and tracing it. I live in a newer neighborhood that has nothing but flimsy leaves, so that wasn't an option for us. Instead, we opted to print out a template (of different shapes of leaves), trace them onto coffee filters, and then cut them out. The template we used can be found here.

The kids had a great time scribbling, making designs, drawing pictures and writing words on the leaves and then watching them disappear into fuzzy, pretty, mashed up colors on the leaves after they were soaked with a wet paintbrush. However, I would recommend putting the coffee filters on a baking sheet before soaking them with water so the colors don't leak on anything important.

If it's a nice day when you make this, you can even let your coffee filters dry outside (which is a much quicker process for the little ones who don't tolerate the wait as well as others...).

We actually cut our leaves out after they were dry - that way we could pick the parts of the dry painted areas that we liked the most...but, you certainly could cut them out before too - either way it will work beautifully.


The leaves all took on their own colors and lives and we thought they were just beautiful. We ended up taping them to our window, and they seemed to have just a little bit of stained-glass look to them. That was unexpected and very pretty.


This is such a great fall project. What a great way to get in the mood. Put on the kettle for hot water to prepare for hot chocolate or tea, pop some popcorn and enjoy the afternoon with your kids decorating your home with homemade fallen leaves. Happy Fall!

Wednesday, September 25, 2013

Homemade Toiletry Carrier

Many, many months ago, back in January, I believe, there was a status going around facebook to challenge people to make the first 5 people that commented on your status a homemade gift, and in return, those 5 people would post the same thing as a status and also follow-through. The idea was great! The expectations of it actually getting done? Probably, fairly low. But, I completed mine! I finally did it. It only took me 9 months. Oh brother. At least I did it eventually though! I found this great little project on Pinterest, but without instructions, so I improvised and made it as best I could. As stated, there are no instructions, but the blog that this was linked to was still pretty cool at showing a few different DIY projects to give you some ideas - so it may be worth a little look-see. Check it out here.

Photo from Pinterest
Because I didn't have any instructions to follow, I tried my best to use what the Good Lord gave me to create this nifty washcloth carrier. I started out by laying toothpaste and a toothbrush on a washcloth and sticking a pin in between them, moving them over once in order to make 4 pockets, and then started sewing.

I cut two pieces of ribbon and on one side of the washcloth, I sewed them both together, being sure to get under the fold of the washcloth fabric so the stitching wouldn't show quite as much.


I then sewed where each pin was in place to make four pockets, being sure that the ribbon was, again, underneath the fold in the washcloth. 

Here it is, all rolled up with toothbrush and toothpaste inside.


This was way quick and way easy. In order to make it a little more special and not so much exactly the same for each gal that I was making one for, I asked each of them to tell me their favorite colors and things that they loved. Then, I used my silhouette cameo and some fabric ink, and painted each one to be unique for the friend that would be receiving it.


Without doing the painting, this project took about 10 minutes or less for each washcloth carrier. The hard part was the painting, but it was also rewarding and fun to spoil my friends with something more than a "blanket" project. I will totally make these as gifts again...and will probably make one for myself as well. (My apologies to any friend who receives this at some point and doesn't feel so "special" anymore. This does not negate your specialness, as much as it proves my laziness. hehe) So easy, quick and handy. Hopefully my little tutorial will help you be able to make it as well, if you wanna.

Monday, September 23, 2013

Sassy Water

Begin pregnant means drinking more water. *Sigh* This is not something I'm very good about doing. Granted, I don't really want anything else to drink, I just don't drink as much water as I know I should. But, that has recently changed. Thank you, Pinterest!! Well, actually, thanks to the link I found on Pinterest that took me to some page in a foreign language where half-way down the page, written in English, was the recipe for Sassy Water. Yep, Sassy Water. Oh boy, is it tasty and refreshing!

Photo from Pinterest
I didn't make it exactly as described, because I made it to go in my water bottle that pretty much goes with me wherever I go. So, my portions were smaller. I also used less cucumber than anything else, because I found the cucumber taste to be too strong originally. Just a hint of cucumber was perfect. But, the mint and the lemon. Mmmmmmmm! Oh, so good!


Unfortunately, because of the water bottle I was using, you can't see how beautiful the drink is. You'll just have to rely on the photo above. What I can say about this, though, it helped taper my hunger in between meals, it was refreshing, and when I emptied the water bottle after a day and refilled it with just water, there was still some flavor in the cup. Lovely. I think the next time I make it, I will try to make a pitcher of it so I don't end up accidentally sucking some mint leaves up my straw. HA! Not that it was bad tasting...a little mint is quite nice and refreshing on it's own. But, I'm thinking the water may have a great taste, and I don't need to have all of the ingredients in my water bottle to make it taste wonderfully.

So, yeah, give this refreshing drink a try - especially if you aren't a big fan of just water. This flavored water is tasty, refreshing and thirst-quenching.

Wednesday, September 18, 2013

DIY Sea Glass

One summer day, as I was watching my niece and my nephews, during a time when my toddler son and my toddler nephew were napping, I found a fun project for my niece, nephew and myself to do.  It was easy, didn't take much brain power, wasn't too messy, too time-consuming or too material-heavy and it had fun results. As usual, I found this little project on Pinterest. However, the link just takes you to the picture I've posted below, so I didn't see a reason to post a link to that as well, as you can view it here.
Photo from Pinterest
 At first, I had trouble trying to figure out what glass to have the kids paint, but I decided going with vases was a good option - then they could give them as gifts at some point...or, they could keep them and enjoy the fruits of their labors. Thankfully, I have more vases than I know what to do with, so that required no effort or sacrifice on my part. I gotta be honest though...I did pull a glass pizza sauce jar out of the recycling for Peyton to use...she didn't notice and I'm still happy with that choice. I feel little to no guilt about it. I *might* feel a little guilty if she was a little older and knew better, but she didn't. MUAHWAHAHA! *Ahem* 

Anyway,  I poured the food coloring in with the Elmer's Glue and water and mixed it and since there is no blog about this already (that I could find), I'm posting more pictures than normal so you can see how it worked for us. Here is a picture of the mixture before it was mixed. I decided, to be on the safe side, to use a plastic bowl and knife to mix it (what else are plastic knives good for anyway?) as I didn't want to risk ruining something that I wouldn't want to throw away. 


Below is what it looked like after it was mixed....like paint. Kinda runny paint. 


After Gabe & Peyton chose their colors for their vases and all the paint was mixed, we got to the fun part: painting our vases!


As you can see, the paint was very runny and messy, but it worked. You definitely had to be thorough in your painting in order to get it to look anything like the picture above. The paint had streaks, splotches and bare spots if we weren't careful, but that's part of learning, right? 


We set them to dry on a paper towel and I would recommend moving the vases every once in a while to prevent them from sticking to the paper towel. Maybe using wax paper or something like that would've been better? Oh well, this worked just fine. I'd also recommend putting them on a placemat or something as well. I learned that very quickly as the placemat had blue, turquoise and pink rings from the vases. Thankfully, it did wash off just fine, but I wouldn't want to test that on my countertop. 


Once dried, I thought they all looked lovely. They may be a little more see-through than the picture from Pinterest and that could probably be prevented with a few more layers (I wasn't patient enough to try that). Either way, I thought they all turned out very sweet. And Peyton's pizza sauce jar? Well, I'm planning on decorating that with ribbon at the top - that'll make for a beautiful vase in itself, I think. 

I've waited a while to post this blog as I wanted to fill at least one of the vases with flowers so you could see the completed project and I finally got around to it! So, here it is! The finished project complete with flowers: 


This is the blue vase and since it was still fairly see-through, you can tell that the blue doesn't show up super great against the green stems, but I'm ok with that! I'm still happy with the results and how fun to have something other than a clear glass vase to put your flowers in?? 

This would make a great gift and your kids could either help or make their own or (if you are a bit of a perfectionist and control-freak) they could watch you. hehehehe. Better yet, have them make one and you make one too. You can never have too many pretty colored vases!  

EDITOR'S NOTE UPDATE: I just cleaned my vase and the color is practically all gone. I believe, in order to do this with greater success, you will want to be sure to just rinse out the vase after use - or even just wipe it down. 

Thursday, September 12, 2013

Fun & Easy Paper Plate Monster

Recently, while watching my nephew, Mickey, I came to a road block. I am known for being the Aunt who does projects with her nieces and nephews. I think they all get more than a little disappointed if we don't do something at least a little crafty when they come over. Alas, I had nothing planned and my day with Mickey was jam-packed with activities outside of my home, which means little to no time for crafting. Not that I make a habit of doing a project every time I watch my kiddos, but I do try to do something most times. Thankfully, I found something simple, quick and easy to do. A Fun and Easy Paper Plate Monster AKA Monsters, Inc. Mike Wazowski paper plate.

Photo from Pinterest
Thankfully, I had all of the stuff to make this. I didn't do it just as described in the above blog as I was short on time. We used markers instead, and that seemed to work out wonderfully.


While Mickey colored the paper plate, I worked on cutting out the little pieces. I cut them out of another paper plate so that the paper would be as stiff as the paper plate was. I liked that idea and I'm still happy with that decision.


After it was all colored, Mickey colored in the eyeball and then we worked together to glue on the monster teeth, horns and eyeball.


He was quite pleased with the end result, but wanted this to be a mask instead of just a monster face (always thinking outside the box, this kid.) and, thankfully, I had some large tongue depressors that I thought would work nicely. It didn't hold up very well on the back as I would've liked, but I'm sure with some more time to prep and make it work, it would've stayed on a little better. We taped it to the back of the paper plate and it worked ever-so temporarily.


This was a quick project that required little assistance from my part but Mickey really enjoyed. It's a great rainy-day or it's-too-hot-to-be-outside-day project and it takes just long enough to not be too long. (You know, children with their short attention spans and all...) Anyway, easy, quick and fun. Yep, I enjoyed this one and Mickey did too!


Monday, September 9, 2013

Zucchini Pizza Boats


It's time, once again, for another meatless Monday! As I mentioned in a recent blog post, I have come into a great wealth of zucchini. Tis the season, right? Anyway, I saw this recipe for Zucchini Pizza Boats on Pinterest a while back and have been anticipating giving it a try, and so I did! To see the recipe, check out this link.

Photo from Pinterest
These were incredibly easy to make and the taste was...well...it was summer. It was delightful and light and summery. The recipe only mostly explained how to make this (you know, kinda like in The Princess Bride when Wesley was only MOSTLY dead...he was still alive, after all...maybe I just wanted to reference The Princess Bride and the two really have nothing in common but the word "mostly"...awe well....), so I will tell you the adjustment I made. The recipe says to mix the garlic & the salt and pepper, but it never does have you apply it to the zucchini. What I ended up doing was mixing the tomatoes in with the garlic, salt & pepper mixture. This seemed to work out very nicely. 

Farm fresh tomatoes with farm fresh garlic...mmmm
My zucchinis were rather large, so I gutted them of the seeds and then filled them with the ingredients. 


I ran out of mozzarella cheese, so some of our zucchini boats had colby-jack cheese instead. They still tasted pretty good, but I preferred the mozzarella cheese. 


Oh heavens, these were good. Very tasty, very refreshing. My husband says he'd prefer them as a side dish (this was our main dish), but he agreed that they were very good. I, on the other hand, devoured mine and the only thing I was left wanting, besides more, was maybe something a little hardier. (Spoken like a true American, right?) Anyway, will I be making these again? Most definitely. Was this a Pinterest fail? Not even a little. 

Friday, September 6, 2013

Canning tomatoes!


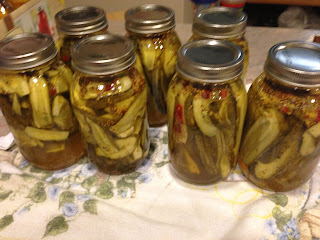
For the first time ever, I've done a bunch of canning this year. I've been completely intimidated for years to can anything more than peaches (which I did for the first time last year with the help of my awesome mom). But, I did it!! This year was the year for canning. I canned stewed tomatoes, peaches, bread & butter pickles, sweet pickles, and green beans. I feel very accomplished. This post will specifically be about canning tomatoes. I am so grateful for all of the tutorials that Pinterest has led me to, including this one! If you click on the "canning tomatoes" link, it'll take you directly to directions for that - but I found this whole website so very helpful, that I wanted to make sure you could see it too: http://www.thyhandhathprovided.com/p/preserving.html

Not only does it teach you how to can, but also what you should can, what you should freeze and the recipes that they use for preserving your fruits and veggies. Seriously. I loved this website. It was my lifesaving canning Bible as I slowly let go of the fear of canning and got to it. 

The first thing I did was the stewed tomatoes. Easiest. Canning. Ever. Not even joking. You don't even have to water bath these babies! I didn't ask for any assistance, I just read the post and got busy. I could not be happier with the results. 

I didn't take many pictures as I wasn't sure how this would go and I knew that if it didn't work, it wouldn't be so much of a Pinterest fail as a Heidi-fail for lack of canning knowledge. But, I did it. It worked. And I'd suggest if you are wanting to learn to can - this is a great place to start because it is so very easy. 

Here is the picture of my tomatoes all processed and ready to be eaten or stored. 


The initial investment for canning can be pricey, considering you need to buy jars and lids and the produce and (unless you have an awesome mom or friend or other family member) get a pressure cooker, but once you've done it - the rewards are great and the following year, you are pretty much just paying for lids and produce. Way cheaper! At least that's what I'm telling my husband. hehe. Just kidding, that is what I've heard as well. 

So, this is my post to assure you that canning is not as scary as it seems. Read thyhandhathprovided's website. It will re-assure you and equip you far better than I, a canning novice, could ever do. 

The hardest thing to can was green beans, because it required the pressure cooker - everything else only required a water bath. But, thankfully, I had a terrific friend who assisted me and taught me how to use the pressure cooker and make sure all went smoothly. Plus, she let me borrow her pressure cooker. She was another great resource for me that has helped build my canning confidence. If I can help re-assure or guide you any further, let me know. I totally enjoyed canning and I'm really looking forward to doing it next year!

And, just because I'm so proud of all my canning, here is a picture of the rest of my canned goods.

Green beans 
Bread & Butter Pickles
Peaches
My Aunt Carole's Amazing Sweet Pickles
PS - I found the recipe for canning peaches on Pinterest as well and it is way easy. To see how to do that, check out this blog.

Wednesday, September 4, 2013

Chalkboard Placemats

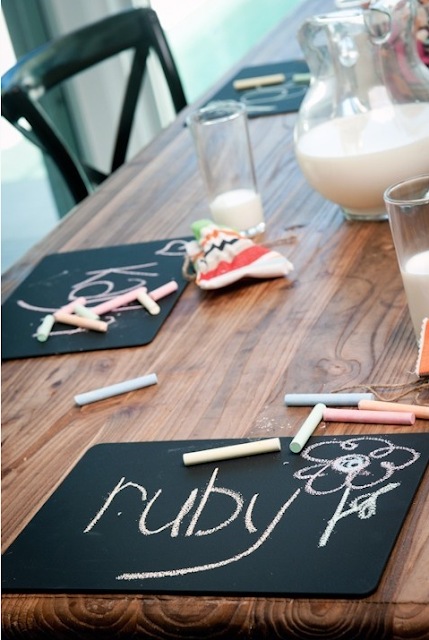
A week or so ago, I was doing a painting project. Specifically, the rainbow fan painting project. My son wanted to help, but I didn't think that was such a good idea, so while the rainbow fan dried, he and I worked on a project just for him: Chalkboard Placemats. To view this specific post on The High Heeled Hostess' blog, you will have to scroll through some other posts. It appears the chalkboard placemats post is near the bottom of the page. But, the rest of her blog looks pretty interesting and I think it's worth a gander.
Photo from Pinterest
While we were at the store that day (getting the paint for the rainbow fan), I picked up a cheapy placemat...seriously, I think it was under a $1.00 - score! This is definitely the right time of year for cheap plastic placemats; everybody clearing out their summer stock to make way for fall.


We stirred up the paint, took off my li'l helper's clothes that we didn't want to get paint on, and then went to work. Yes, this is a before picture...that way you can see that my son is occasionally dressed and does like to play with plastic utensils. Um...yeah, don't worry - he didn't jab himself in the throat. He had that long enough for me to take the picture and go "wait a sec! You should give that to me..." Always nice to have evidence of the amazing job we do as parents, right?? Oy.


After all dangerous utensils were removed from the hands of the toddler and he was in nothing but a diaper, we started painting. He enjoyed this for roughly 15 seconds. Thankfully, it didn't take long to complete and, since it was a hot day, it took very little time to dry as well.


This worked wonderfully!! The chalk wrote nicely on the black placemat and my son had a blast doodling...again, for roughly 30 seconds...ok, I should give him a little more credit...it was probably more like 3-5 minutes. Awe, the attention span of a 2 year old. hehe. Oh well. He has come back to it a handful of times and continues to color on it and, although I haven't yet, we can also use it at dinner. I see some creative ways of getting him to sit still at the dinner table with this little gem! In order to clean this, we did need to wipe it down with a wet cloth, but that's no biggie. We'd do that if it was at the table and wasn't drawn on anyway.

I'd definitely say this is a Pinterest win!

Side note: I've had the same chalkboard paint for multiple projects and it lasts a very long time. I'd say it's worth the very small investment if you like to craft-it-up.

Anyway, give it a try with your kiddos...it's definitely a fun little project.


Monday, September 2, 2013

Strawberry-Peach Crisp

One of my favorite past-times this summer has been picking produce. I love berry picking, tomato picking, peach picking, green bean picking...if I can pick it - and eat it - I have been enjoying doing so. Recently, my son, husband and I went out peach picking. We picked a bunch of peaches so we could freeze them for smoothies. By the way, if you haven't seen it yet - check out my past post about freezing produce - I used this method for freezing my peaches and it's worked brilliantly.

Our picked peaches
 I didn't want to freeze all our peaches though, so I decided to use some of them to make a crisp. I like crisps better than cobblers, although I always get the names mixed up and just kinda use them interchangeably. In case you didn't know, a crisp has more of an oatmeal-type topping while a cobbler has more of a dough-type topping. (The more you know...) Anyway,  in steps a recipe discovered via Pinterest, strawberry-peach crisp


Photo from Pinterest
Thankfully, we also had a few strawberries from our weekly CSA box, so I used those to make this tasty treat. This was incredibly easy to make, although I don't believe I used quite enough strawberries, it still worked out nicely. 


So yummy looking already!
Doesn't that look good? Oh yes, my friends...it was. Indeed, it was.

Ready to go in the oven
It didn't look as appetizing once the top layer was put on. It just looked dry and crumbly...and it continued to look pretty much the same as it does in the above picture when I took it out of the oven. That was slightly disappointing considering the beautiful, mouth-watering picture that was on Pinterest. Maybe I didn't have enough of the innards? I'm not sure...I think it was because the top was much thicker than the filling, but, as you can see, after I put it in a bowl and mixed it a little bit, it looked pretty tasty.


At first I thought this recipe was so healthy because it called for whole wheat flour...that's gotta mean it's healthy, right?? Notsomuch. Maybe if there wasn't any butter and such, but it was still a healthier alternative to some other things that I have eaten. And it did taste delightful. 

And adding a dollop of real whipped cream on top made this dish into a masterpiece. Mmmm. My mom and I both really liked it. My son liked the whipped cream. My husband isn't much into pies or sweets with fruit in it (unless it's apple) so he wasn't as crazy about it. But, if you like crisps, if you like fruit, I think you will like this. I shared it with some friends (there was no way I should - notice I said 'should' and not 'could' - eat that much just between me and my mom.) and my friends really enjoyed it too....or so they say. :) I'd recommend this dish, for sure. Give it a try, but maybe add in a few extra peaches and strawberries to make for a more delectable looking dish.