Wednesday, July 30, 2014

Cheesy Ground Beef Rice Casserole

So....this post is going to be boring, unimaginative and brief. My brain doesn't want to work so hard to be creative, so I'll write within the capabilities of my tired brain and call it good. Get ready for short and sweet. 

Photo from hungrylittlegirl.com
I didn't have any sour cream, so I used plain greek yogurt. I didn't care for the taste of the greek yogurt all that much in it, but it worked. I also didn't read the directions closely enough and put the greek yogurt and cheese in before I popped it in the oven. So, the picture of my dish vs. the one above doesn't look near as tasty. Oh well.


After it was all baked, I plated it with some steamed veggies and we ate.


This was delicious, although next time I will try it with sour cream and add it in at the right time. My husband thought it was a bit too cheesy, but for those who love cheese, this is definitely a good meal and it doesn't take too long to make.

Thursday, July 24, 2014

Sticky and Sweet Slow Cooker Chicken

I know I've said it before, but why do I not think to use my crock pot more during the summer? It doesn't overheat the house and you still get some mighty tasty meals. I tried a new recipe in my crock pot the other day. Sticky & Sweet Chicken Drumsticks.

My husband is the master griller, but we were on a tight schedule the other night so I knew there wouldn't be time to stoke up the BBQ and get the meat all grilled before I needed to leave, so this was the perfect alternative.


The preparation wasn't too hard, and I actually pulled the chicken out of the freezer and put it directly into the crock pot. The time-consuming part was making the BBQ sauce. You certainly don't have to make your own sauce, I'm sure, but I thought I'd try it out. 


After the sauce was made, I poured it on the chicken and turned the crock pot on high. The recipe calls for covering the chicken in the sauce and making sure it's all mixed in. 


I turned the chicken and made sure to smother the BBQ sauce all over the meat about halfway through since I wasn't able to do it in the beginning with the chicken frozen solid. I had it cook for a little over 4 hours on high since the meat had been frozen. I don't think that was necessarily a good choice; the meat wasn't very juicy by the time all was said and done. But, it smelled amazing.


After the chicken was broiled on both sides, we served it up with some yummy salad, rolls, watermelon and pasta salad.


This dish was beautiful and tasty and summery. In the future, I may not cook the chicken for as long since it was a bit dryer than I would've liked, but it still turned out quite delightful. Sweet and, indeed, sticky, but yummy! 

Friday, July 18, 2014

How To Shuck Corn

Do you remember when you were a kid and you watched your mom (or dad) shucking the corn off the cob and would beg to do it, and then once you started you were immediately tired of doing it? Or, was that just me? The worst part was the little tiny corn hairs (I totally had a moment of forgetfulness and couldn't remember the name of that stuff! It's corn silk by the way!) that seemed to stick like static to the corn or to your arm, your fingers, your...well, just anywhere that it landed it seemed to just cling. So, as I grew older I grew smarter (except for the occasional brain fluffs - "corn hair"? really?) - I quit begging to do it and began hiding while it was being done, frequently unsuccessfully. 

As the main meal maker in my home, I have now reached a time in my life where I am having to shuck the corn. My husband is gracious enough to help me when he's available to do so and my kids haven't reached the age where it's fun to do it - or at least it appears to be fun to do. So, I work real hard removing every last strand of corn silk. Until today. No more do I work real hard on this. 


Thanks to the Huffington Post, you don't have to anymore either! Check out this video for a more visual description.

No peeling, no mess, no heating up the kitchen. Stick the whole ear of corn (I did one at a time) in the microwave, set it on high and cook for 3 minutes.


After the microwave dinged at me, I used my ove-glove (although you could use a regular pot holder if you don't have the awesome ove-gloves (aka grill gloves) ) to remove the corn from the microwave. It will be very hot.


After you remove it from the microwave, cut off the shank (the end that doesn't have the hair) and a little of the corn. Then grab that corn by the peel and the silk and give it a super good shake. It pretty much just falls right out, although I did have a time or two where the corn didn't shake out very easily. Nuking it a bit longer probably would've been a good idea at that point, but it eventually did come out after many brutal shakings.

 
I did this with 8 ears of corn and out of the 8, 2 were a little more difficult to remove - nothing as challenging as peeling without this step though. This was fantastic.

At this point, the corn is cooked and you can eat it, although I prefer the way my mom cooks corn, so I proceeded to boil the corn with a little lemon juice and a pinch of sugar and they were delish! 

And now you know the secret to shucking corn. I don't know that shucking corn has ever gone this smoothly or quickly before. I will definitely be doing this again. 


Tuesday, July 15, 2014

Cheesy One Pot Pasta with Parmesan and Pine Nuts

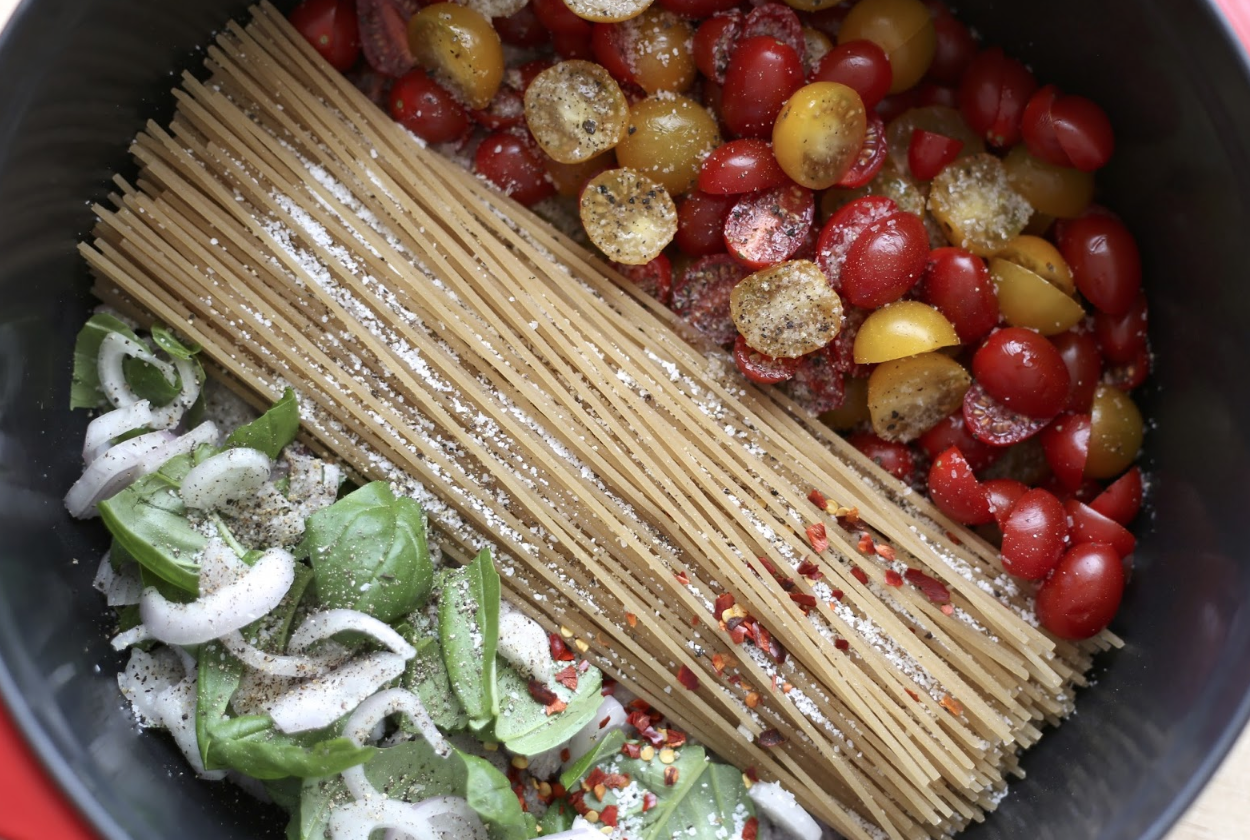
Awe dinner...I have a love/hate relationship with you. I LOVE to eat, but coming up with a plan of what to make at last minute - I hate. This could always be avoided if I would just sit down and plan out my meals for the week, but alas, my organizational/scheduling skills have not attained this level of greatness in recent years. Thankfully, there is this great site called Pinterest that helps the procrastinator in me. I discovered this recipe a while ago and since I had all the ingredients, I gave it a try. To check out the recipe, go here.

Photo from Barefeet In The Kitchen's Blog
This was super quick and took little preparation. The most time-consuming part of the preparation was cutting the tomatoes, shallots (or onion) and basil, which took just a few minutes.


30 minutes, start to finish and this dinner was ready to go. It was delightfully simple and tasty. It had a little kick to it from the red pepper flakes, but it was kind of a nice addition to the dish.

Barefeet In The Kitchen's blog says that this is really creamy, but mine didn't turn out quite as creamy as I had hoped/expected. I may not have put in enough cheese though. I definitely liked the added crunch of the pine nuts though. That was uber tasty. Highly recommend doing that.


In conclusion: Simple recipe = happy mama. Yummy recipe = happy daddy (and everyone else). Quick recipe = happy kids. Yay for another Pinterest win!


Wednesday, July 9, 2014

Super Giant Bubbles Recipe

Bubbles, bubbles everywhere! Here's a fun activity to do with your littles to keep them entertained. Bubbles!  

Photo from Pinterest
There is no link to share as this was just an image, so I'll just tell ya about my experience. Cade helped me make the bubble solution. 


This was super simple. All of the ingredients were things I already had at home. The only thing I struggled to find was a big enough bucket...oddly enough. I guess my brain just wasn't fully functioning when I was making this. I ended up using a mop bucket, which worked well, but for it being a bit larger than necessary. Seriously, if that's the biggest concern, it really was no biggie.


Stirring the solution without creating bubbles was more of a challenge than I would've expected. I think it was due to the corn starch sticking to the bottom of the bucket. Oh well. We made it work.

I set the timer for an hour and put the bucket out of site so Cade wouldn't be impatiently waiting and we went swimming while we waited. I love summer. 

Once the solution had sat for an hour, we took it outside and blew bubbles. Cade had trouble blowing them, so I did most of that - but he had a blast popping them. 


The bubbles weren't super wimpy bubbles either. It was quite nice. I used a bubble wand that we already had from the dollar store and we also made some out of pipe cleaner. All worked nicely. 

"Seriously, mom, a picture? Just blow the bubble for me already..."


We left the bucket outside to play with over the next few days and the bubble solution never faltered. It worked wonderfully and continued to produce bubbles as long as the blower had some skillz. Yep, with a 'z.' Because, I am that cool. There you have it. Easy-peasy bubble making recipe. 


Thursday, July 3, 2014

60 Minute Cinnamon Rolls

Just the other day I posted about some tasty paleo cinnamon rolls and this is the sister blog post to that one. The fat sister. The unhealthy, but terribly good looking sister. (I feel like I went too far...too far?? Oh well...) :) 60 Minute Cinnamon Rolls. Pure bliss.

Photo from yourhomebasedmom.com

These cinnamon rolls took practically no time to make, as far as cinnamon rolls go. The recipe called for regular yeast, but all I had was bread machine yeast (don't you hate it when you don't discover this until after you are in the middle of mixing??). I went to the Fleischmann's yeast website and found that I could, in fact, use bread machine yeast as regular yeast. Yay! Fleischmann's and my bread machine yeast for the win!

Once I got the starter ingredients in the bowl, I let it set for a bit. It was uuuugly and I didn't take a picture of the yeast mix after it had foamed, so I'll just spare you the gory image of disgustingness. 

As the yeast was foaming, my son and I started working on the chocolate chip cookies I was also preparing for our MOPS retreat. This is totally unnecessary to this blog post, but I thought I'd share so that I could show you how baking is done at our house....


I suppose this could have something to do with this post as it shows you just how quick and easy making these cinnamon rolls was - I was able to do it as I made chocolate chip cookies. Oh yeah! This sweet toothed mama was happy!

After all of the ingredients had been mixed and set for the allotted amount of time recommended, I sprayed down my kitchen counter with pam (after it had been washed and dried better than a surgeon right before surgery). Seriously, how had I never thought to do this? The dough was so much easier to work with when the surface was greased. 


Obviously, I still didn't get the perfect rectangular shape, but as I stated in my paleo cinnamon rolls blog, I'm not so much into taking a ton of time getting it into the right shape. After preparing the filling, I spread it out on the rectangular blob and patted it down. 

I took a hint from the last cinnamon rolls I made, and placed parchment paper in the bottom of the baking dish I would be using. From there, I rolled up the cinnamon rolls, made marks where I'd be cutting them so they'd be even (for the most part) and then cut them apart and placed them in the baking dish. Don't they look divine?


I didn't bake them right away, in fact, I put them in the fridge and didn't bake them for 2 days. They continued to rise a bit over the next 24 hours (I think they stopped after that) and the lid was being pulled off of the baking dish due to the sheer mass that the cinnamon rolls were creating. It was a beautiful thing. 

On Sunday morning, I took the dough-y rolls out of the fridge and placed the baking dish with the rolls into the pre-heated oven. Obviously I removed the lid on the dish as well. 

Thankfully, my lovely friend, Katie, helped me determine whether the rolls were done when they were supposed to be. I put them in the oven for the entire 15 minutes and looked at them, thought they looked good and pulled them out. Katie, however, being the wise one that she is, told me that, although they looked super tasty, the middle ones were still looking quite doughy. So, back in the oven they went. 5 minutes later we pulled them out and flipped them over onto a cookie sheet. Everyone delighted in the beauty of these tasty looking cinnamon rolls. Did you catch that? "Tasty looking." Yeah. They still weren't done enough. Everyone that had taken a bite quickly discovered they still needed quite a few more minutes. So, back into the oven they all hurriedly returned.


Within a few minutes (10, maybe?), we pulled them back out of the oven and they were definitely cooked and, although now a bit more crystalized from the frosting that had been melted and then hardened in the oven, were still delicious. I imagine the 15 minute bake-time would've been perfect had it not been for it being in the fridge and likely needing to thaw for just a bit. Oh well, lesson learned. And I'm not really complaining. These still tasted pretty fantastic.